
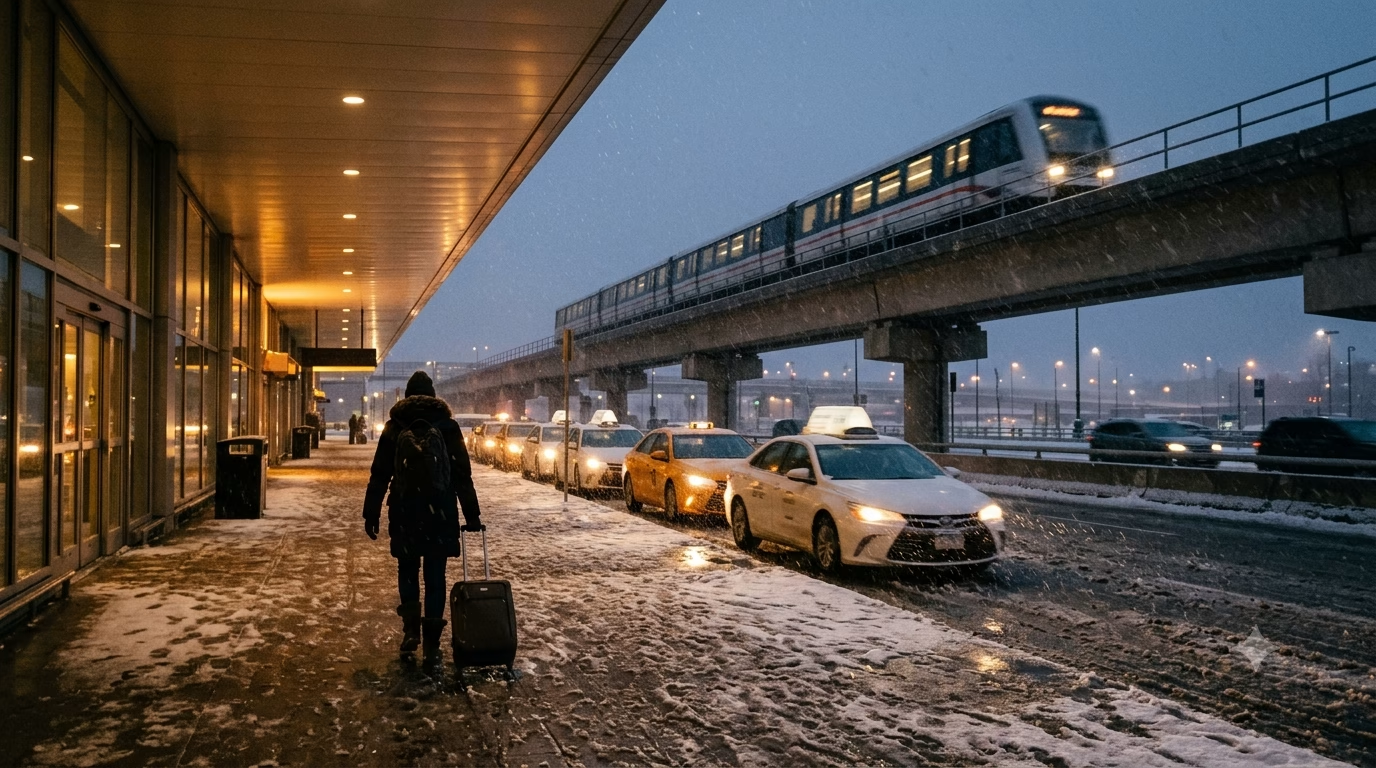
Navigating Canada’s Winter Weather: What to Expect
Canada’s winter is not one weather pattern. It’s a mix of cold snaps, lake-effect snow, freezing rain, and fast-moving storms. For Canada airport transit options in winter, that matters because the “right” choice can change by the hour. The same airport run that feels easy on a clear day can turn into a slow crawl when roads glaze over.
In most of the country, expect snow season to run roughly late November to March, with the deepest winter usually in January and February. Coastal cities like Vancouver stay milder and wetter, but a rare snow dump can still snarl roads because drivers and plows see it less often. Prairie and inland cities like Calgary, Edmonton, Winnipeg, Ottawa, and Montréal get colder and drier, with real windchill and packed snow that sticks around for weeks. In Toronto, you’ll often see slushy sidewalks one day and sheet ice the next.
What this changes for airport transit is simple: snow slows traffic, but ice stops it. Freezing rain is the biggest troublemaker for pickups and curbside chaos. It can delay flights, but it also delays the “last mile” out of the terminal, when sidewalks and ramps get slick and luggage wheels stop rolling. Even when highways are cleared, airport access roads and parking garages can stay messy after a storm.
- If it’s heavy snow: trains usually stay more predictable than road trips, but expect slower taxi/rideshare times and surge pricing.
- If it’s freezing rain: choose the simplest route with the fewest transfers. One extra connection can mean a long, icy wait outside.
- If it’s extreme cold: short outdoor walks feel longer. A 7-minute curb-to-platform walk can be painful with windchill.
Two small precautions make a big difference. First, wear real footwear. Smooth-soled sneakers are a common mistake, especially when you step from warm terminal floors onto polished ice near the curb. Second, pack your “outside layer” where you can reach it fast. If your coat and gloves are buried in a checked bag, you’ll feel it the moment you get funneled to an outdoor pickup zone.
Staying connected matters here because storm days change plans fast. You may need to rebook a ride, switch to rail, or message a hotel about late check-in. With Telekonek Canada eSIM data plans, you can activate data before you land and keep working service updates as you move. Telekonek also offers eSIM plans that work in 200+ countries, which helps if Canada is one stop on a longer winter route.
Takeaway: In Canada, plan your airport exit around ice risk and real-time updates, not just distance on a map.
Airport Authority Services: What to Know on Arrival
When you land in Canada in winter, the airport authority is your first “transit control tower.” The fastest way out is usually the option the airport is actively managing that day. Look for ground transportation desks in the arrivals area, plus airport ambassadors in bright jackets near the baggage belts. They’ll tell you which pick-up zones are open, where queues start, and what’s delayed because of snow removal.
Start with the airport’s official information counter before you join any line. In storms, airports sometimes move pick-ups to a different curb or parking level to keep lanes plowed. If you’re using Telekonek, you can pull up the airport’s live updates, maps, and curb-side notices as you walk—no waiting to find Wi‑Fi that’s overloaded after a delayed flight. Your one job: confirm your exact pick-up letter/door number before you roll your bag outside.
Most major Canadian airports run winter-ready curb management with clear zones for each Canada airport transit options in winter:
- Taxis: controlled taxi stands with attendants. In heavy snow, the line can look long but moves steadily because cars are staged.
- Rideshare: designated app pick-up areas, often on a specific level of the parkade. In a storm, it’s common for drivers to cancel if you’re waiting at the wrong door.
- Public transit: indoor access to rail/bus links at bigger hubs (you’ll get details in the next section). In icy conditions, this is often the safest “no-surge” option.
- Shuttles and hotel vans: numbered bays. Ask staff which bay is actually operating today—some routes pause when highways are bad.
Winter-specific help is easy to miss. Many airports keep indoor waiting areas near ground transport so you’re not standing in windchill while your ride crawls through traffic. If you’re traveling with kids, skis, or extra bags, ask about baggage carts that can go to the parkade. Some airports restrict carts to certain zones, which becomes a problem when pick-ups move to a garage level.
Watch out for the classic winter arrival mistake: stepping outside to “find your ride,” then losing your spot in a managed taxi/rideshare queue. Stay inside until you’ve confirmed your pick-up point, driver status, and the exact door. Telekonek data helps here—screenshots of maps and messages save you when your hands are full and the curb is chaos.
If you want your phone set before you hit the baggage carousel, use a Telekonek Canada eSIM so your maps, transit apps, and ride updates work the second you land.
Takeaway: In winter, follow the airport’s managed pick-up zones and confirm the exact door/level indoors before you step into the cold.
Public Transportation Options: Buses and Trains
Public transit is often the most predictable pick for Canada airport transit options in winter, because trains run on their own right-of-way and airport buses usually get priority routing. The trade-off is walking and waiting outdoors. In a cold snap or freezing rain, that “last 200 meters” can feel like the hardest part.
Toronto Pearson (YYZ): Your simplest rail option is the UP Express from Terminal 1 to Union Station. Trains run about every 15 minutes most of the day, and the ride is roughly 25 minutes. In winter storms, UP Express is usually steadier than highway traffic, but service can still slow if there’s a track issue—check live updates before you leave baggage claim.
If you’re price-focused, the TTC is cheaper but slower. The key route is MiWay 7 from Pearson to Kipling Station, then subway into downtown. The watch-out: buses can bunch up in heavy snow, and stops around Kipling can be windy and icy. Give yourself extra time to transfer and keep your gloves accessible, not buried in your bag.
Vancouver (YVR): The Canada Line (SkyTrain) connects YVR–Airport Station to Waterfront Station in about 25–30 minutes. Vancouver winter is often wet. Wet plus cold equals slippery station stairs and platforms. Use elevators if you have a roller bag, and step carefully when you transition from heated terminals to outdoor walkways.
Montréal–Trudeau (YUL): The main public option is the STM 747 airport bus to downtown (Berri-UQAM / Lionel-Groulx area depending on direction). It’s frequent most days, but winter traffic on Autoroute 20 can turn a normal run into a long ride. Bring a small snack and water if you’re landing late, because waiting at the curb in blowing snow is draining.
Calgary (YYC): Calgary Transit runs airport bus links to the Blue Line (CTrain) via nearby hubs (routes can change season to season). In deep cold, your biggest risk is missing a connection and standing still for 10–15 minutes. Plan transfers so you’re not stranded between services after 10 p.m.
- Winter-proof navigation: Load your route before you exit the terminal. With Telekonek’s Canada eSIM, you can pull live arrivals, platform changes, and detours without hunting for stable Wi‑Fi.
- What goes wrong: The timetable looks fine, but the platform changes or the bus bay moves during snow clearing. Always check the bay number on the posted screen, not just the app.
- Safer waiting: Stay inside until you see your bus or train countdown drop to a few minutes, then move to the curb or platform.
Takeaway: In winter, choose rail first when you can, and use Telekonek data to confirm bay numbers and real-time delays before you step into the cold.
Taxi and Ridesharing: Efficiency and Tips
Taxis and rideshares are the “door-to-door” answer for Canada airport transit options in winter. They’re also the most sensitive to snow, traffic, and curbside rules. On a clear night, you can be at your hotel fast. In a storm, you might spend the same money sitting still on an airport ramp.
Where to catch them (and why it matters in winter): follow the airport signs for “Taxi” and “Ride App Pick-Up.” Canadian airports police these zones hard, especially during snow removal. If you stand at the wrong curb, drivers may cancel rather than risk a ticket. Keep your Telekonek data on so you can message the driver your exact door number, pillar, or level without relying on spotty terminal Wi‑Fi.
- Toronto Pearson (YYZ): taxis are reliable 24/7, but the highway is the wildcard. Expect roughly 35–70 minutes to downtown depending on weather and time.
- Vancouver (YVR): rides are usually smooth, but rare snow days can create long waits because the region isn’t built for frequent heavy snow. Downtown is often 25–45 minutes in normal traffic.
- Montréal (YUL): steady supply most days, but after evening arrivals, rideshare surge can hit hard. Downtown is commonly 25–50 minutes.
- Calgary (YYC): cold snaps can reduce driver availability late at night. Downtown is usually 20–40 minutes, longer if roads are icy.
Fare reality check (2026 ranges): in major cities, airport-to-downtown trips often land around CAD $45–$80 on a typical day, and can climb to CAD $90–$150+ during snow, big events, or late-night surges. Taxis are often steadier on price, while rideshare can jump fast when flights land in a wave. If you’re traveling with two or three people plus bags, that higher price can still beat paying per person on some transit routes—especially when sidewalks are icy.
Best times to book: book after you have your bags, not when you land. Winter de-icing and baggage delays can throw off your timing, and cancellations pile up if you’re not at the curb quickly. If your flight lands around 3–7 pm on weekdays, assume the worst for traffic in Toronto, Vancouver, and Montréal. In that window, a train (covered earlier) can beat a car by a lot.
Watch out for the classic winter failure: your driver accepts, then can’t reach the pick-up zone because airport lanes are restricted for plows. If the app shows the car looping, walk to the official signed pick-up bay even if it’s less convenient. Keep Telekonek running so your map and messages don’t drop right when coordination matters most.
Takeaway: Use taxis or rideshares for warm, door-to-door comfort—but in snow or rush hour, expect higher fares, longer waits, and choose the official pick-up zone every time.
Car Rentals: Winter Gear and Road Safety
Renting a car can be the most flexible of your Canada airport transit options in winter, especially if you’re heading to ski towns, smaller cities, or a hotel far from a rail line. At major airports like Toronto Pearson (YYZ), Vancouver (YVR), Montréal–Trudeau (YUL), Calgary (YYC), and Edmonton (YEG), the rental counters are on-site and well signed from arrivals. The catch is winter: the same 30-minute drive can turn into a slow, white-knuckle crawl when visibility drops or ramps ice over.
Winter tires are the make-or-break detail. In Canada, “all-season” tires are often not enough on packed snow or freezing rain. When you book, look for “winter tires” or “snow tires” as a guaranteed add-on, not a vague “winter package.” In Québec, winter tires are legally required in winter for most vehicles, but out-of-province rentals and edge cases can get confusing. Don’t argue it at the counter—confirm in writing before you land, and keep the confirmation on your phone with Telekonek so you can pull it up even if airport Wi‑Fi is overloaded.
- Ask for: winter tires + ice scraper/snow brush + windshield washer fluid rated for cold temps.
- Nice to have: AWD (all-wheel drive) for traction, but it does not replace winter tires.
- Skip: paying extra for a bigger SUV if it still comes with all-season tires.
Insurance is where costs can jump fast. Expect your daily rate to look “fine,” then climb with add-ons. In 2026, winter rentals at big airports commonly land around CAD $70–$160/day for a compact once taxes and fees stack up, and more during holidays or storms. The smartest move is to decide what you’re covering before you reach the counter: collision coverage (damage to the rental), liability (damage to others), and roadside assistance (tows, lockouts, dead battery). Read the fine print on windshield chips and undercarriage damage—slush hides debris, and ice chunks can crack plastic panels.
Driving tips that actually matter on Canadian winter roads: keep bigger gaps, brake earlier, and treat bridges and overpasses as “ice first” zones. If your car starts to slide, look where you want to go, ease off the gas, and steer gently—panic braking is how you spin. Watch out for black ice (clear ice on pavement) near airport exits, shaded ramps, and lakefront highways. Also, don’t leave the wipers lifted overnight unless you’re sure it won’t freeze mid-storm; sometimes they lock into ice and snap when you force them down.
Navigation is another winter fail point. Storms can close ramps, push you onto detours, or reroute you to a different terminal return lane. Keep live maps running on Telekonek so you can reroute fast, check road alerts, and message your hotel if your arrival time changes. If you’re unsure how much data that takes, this North America eSIM guide helps you estimate it for maps, rides, and travel days.
If you’re planning to drive beyond the city—think Banff from Calgary, Whistler from Vancouver, or cottage country from Toronto—set up your connection before you even leave the terminal. Use a Telekonek Canada eSIM so you’re not hunting for a signal when conditions change and you need directions now.
Takeaway: In winter, rent a car only if you can confirm winter tires, understand the insurance, and keep live navigation running the moment you hit the road.
Airport Shuttles: Direct Transfers for Your Comfort
Shuttles sit in the sweet spot for Canada airport transit options in winter: more direct than buses and trains, less stressful than driving yourself. They work best when you’re tired, carrying skis, or landing late and you just want a warm seat and a predictable drop-off. The main trade-off is schedule. If you miss the departure, you can be waiting in the cold pickup zone longer than you’d like.
Toronto Pearson (YYZ): if you’re staying downtown, look first at the Union Pearson Express covered earlier. For a true shuttle-style ride, many airport-area hotels (around Airport Rd and Dixon Rd) run free courtesy shuttles every 20–30 minutes, but they often require you to call from arrivals. Use your Telekonek Canada eSIM to message the front desk the moment you land, so you’re not hunting for airport Wi‑Fi while your bags get cold on the curb.
Vancouver International (YVR): private airport shuttles and hotel shuttles are common for Richmond and airport hotels. Expect about CAD $10–$25 per person for shared shuttles to nearby zones, and CAD $60–$120+ for private van transfers depending on distance and time (2026 range). In wet snow, drivers may load luggage more slowly to avoid slips, so build in a few extra minutes if you’re rushing to a check-in cutoff.
Montréal–Trudeau (YUL): the reliable “shuttle” feel is often a pre-booked shared van to downtown and key hotels. These typically run on set departure windows rather than exact times. In winter, that matters because flights bunch up after de-icing delays. If three planes land together, you can wait for seats even with a reservation. Keep your booking email and pickup instructions saved offline, but also keep Telekonek data on so you can get live updates if the meeting point changes levels.
Calgary (YYC) and Edmonton (YEG): you’ll see a mix of hotel shuttles and pre-booked vans, especially if you’re overnighting near the airport before heading to the mountains. Shared shuttles to airport hotels are usually free. Longer transfers (like to resort towns) are often CAD $80–$200+ per person depending on distance, luggage, and whether it’s a shared coach or a smaller van (2026 range). Watch the luggage policy—ski bags can count as an extra piece and quietly add a fee at the curb.
- Schedules: hotel shuttles often run every 20–30 minutes; shared vans run in “waves” after peak arrivals.
- Winter handling: reputable shuttles use winter tires and allow extra braking distance, so trips can run longer than the map time.
- Pickup gotcha: snow removal can push shuttles to a different curb or a lower level. Follow airport signs, not old emails.
Takeaway: pick a shuttle when you want warm, direct, and luggage-friendly—then use Telekonek to confirm the exact pickup zone and departure window before you step outside.
Navigating Layovers: Winter-Friendly Airport Amenities
In winter, a “quick” connection in Canada can turn into a long one fast. Snow banks slow down gate arrivals, de-icing backs up departures, and your next flight can slide by an hour without warning. The good news: Canada’s big airports are built for people getting stuck. Your goal is simple—get warm, get fed, and park yourself somewhere with power outlets and a clear view of updates (and keep Telekonek data on so you’re not hunting for Wi‑Fi when the screens change).
Lounges are the easiest winter upgrade because they solve three problems at once: seating, food, and charging. At Toronto Pearson (YYZ), Vancouver (YVR), Montréal–Trudeau (YUL), and Calgary (YYC), you’ll find airline lounges plus pay-to-enter lounge options in several terminals. Expect a range of ~CA$45–CA$80 for a single visit in 2026, depending on time and access rules. If you’re facing a 3–6 hour delay, that can cost less than buying a full meal, snacks, and drinks in the concourse.
- Best for: overnight or storm-delay layovers, families who need space, anyone low on battery.
- What goes wrong: lounges sometimes hit capacity during weather events. If you want in, go early—before the cancellation wave hits.
For food, aim for “real” meals, not snack traps. In big Canadian airports you can usually find sit-down spots, but winter crowds push waits up. If your connection is tight, grab faster options near your gate first, then upgrade later. In Montréal (YUL), look for Québec classics like St-Hubert for a hot, filling plate. At Vancouver (YVR), you’ll often find better-value bowls and noodles in the domestic areas than in the tight international pier. Toronto Pearson (YYZ) has plenty of choice, but prices swing hard—expect ~CA$18–CA$30 for a main and drink in 2026.
Shopping and “time killers” matter more in winter because walking is your indoor exercise. YYZ and YVR have long corridors where you can pace without stepping outside. That helps if you’ve been seated all day and don’t want to feel stiff on the next flight. If you’re stuck late, browse for practical fixes: gloves, a warmer hat, a phone cable, or hand cream (heated terminals + winter air can wreck your skin in a day).
Entertainment and comfort zones are your secret weapon. Some terminals have quieter seating pods, dimmer corners, or kids’ play areas—use them when the main gate lounges turn into standing-room-only. Bring one small trick: download a show, a map, and your next-step transit info while you still have signal. With Telekonek’s Canada eSIM, you can keep boarding alerts, weather radar, and rebooking pages working even when airport Wi‑Fi chokes under a storm crowd.
Watch out for the winter layover mistake: camping at a gate with no power. In Canadian hubs, outlet seats get claimed early when delays start. As soon as you land, charge first, then eat—otherwise you’ll be rationing battery right when you need rebooking and transit updates.
Takeaway: In a winter layover, secure warmth, power, and updates first—lounges or quiet zones plus Telekonek data turn “stuck” into manageable.
Staying Connected While You Travel: Mobile Data and eSIM Options
For Canada airport transit options in winter, being connected isn’t a luxury. It’s how you react fast when gates change, trains pause, or pickups get moved to a different level for snow clearing. You want data that works the moment your wheels touch down, so you can open maps, check platform alerts, and message your driver without hunting for a signal.
The simplest setup is a Telekonek eSIM. You install it before you fly, then switch it on when you land. That matters in Canada, where the first 20 minutes after arrival can decide whether you catch the UP Express, the next SkyTrain, or a shuttle before the line stacks up outside. Telekonek also offers eSIM data plans that work in 200+ countries, so you keep the same routine on multi-stop winter trips.
Pick your data size based on what you’ll actually do in transit. Maps, ride apps, and train updates are light use. Video calls and streaming in lounges burn data fast. If you’re unsure, this North America eSIM guide helps you plan, and then size up for storm days when you’ll be online longer.
- Light (1–3 GB): maps, iMessage/WhatsApp, email, transit apps for a few days.
- Medium (5–10 GB): adds ride apps, frequent browsing, and backup plans during delays.
- Heavy (15+ GB): remote work, hotspot use, lots of video, long layovers.
Airport Wi‑Fi helps, but don’t trust it as your only plan in winter. At Toronto Pearson (YYZ), Vancouver (YVR), Montréal–Trudeau (YUL), and Calgary (YYC), free Wi‑Fi is usually fine for messages. The problem is logins and dropouts when terminals get crowded after cancellations. A common failure: you connect, walk to the rideshare zone or the train platform, and the session times out right when you need a confirmation code. Keep Telekonek data active so your ride pin, QR ticket, and curbside instructions still load on the move.
Use data for the stuff that saves you real time in snow. Load your route before you step outside, then keep your screen brightness lower to protect battery in the cold. Download offline maps for your first neighborhood (Google Maps works well for this), and screenshot any barcodes for train tickets or lounge passes. If your phone supports it, turn on “Wi‑Fi Calling” before you travel, so calls can go through on airport Wi‑Fi when cell signal is weak in concrete parking levels.
Watch out for: cold-weather battery drain. Phones can drop from 40% to dead fast if you’re waiting outside at a pickup curb in -10°C. Keep a small power bank in an inner pocket and use a short cable so you can charge while walking.
Set up your plan before departure and you’ll land ready to move. Start here: Telekonek Canada eSIM.
Travel Safety Tips: Preparing for Winter Airport Travel
Winter airport travel in Canada is less about fear and more about friction. The big risk is getting stuck between “indoors warm” and “outside cold” while plans change fast. Build a buffer so a delay doesn’t turn into a safety problem.
Delay-proof your timeline (and your body). In heavy snow or freezing rain, aim to arrive at the airport 60–90 minutes earlier than you would in summer. De-icing lines can stack up at the gate, which means a flight that “boards on time” still sits. Keep your Canada airport transit options in winter flexible too: if the rail line is running but the highway is crawling, you want to know before you commit.
Pack for the curbside reality, not the terminal. You can be dressed for a heated airport and still lose 20 minutes outside at a shuttle bay. Wear layers that you can peel off once inside, and keep these in your personal item (not your checked bag):
- Insulated gloves that still let you tap your phone screen (thin liners work well).
- Hat or ear cover—wind on open pickup curbs is the kicker.
- Traction-friendly footwear (winter boots or shoes with deep tread). Smooth sneakers slide on packed snow.
- Spare socks in a zip bag. Wet feet from slush can ruin the rest of your day.
- Hand warmers for long waits at outdoor zones, especially late nights.
Watch out for the “slush trap” outside arrivals. The worst ice is often where snow melts during the day and refreezes at night: curb edges, crosswalk paint, and the ramp into parking garages. Take the longer route if it’s salted and lit. If you’re rolling a suitcase, keep one hand free for rails and avoid dragging the bag through deep slush that can freeze the wheels.
Protect your health in dry cabin + cold snap conditions. Canadian winter air and aircraft cabins both dry you out. Drink water before you land and keep a small moisturizer and lip balm in your pocket. If you’re prone to nosebleeds, a saline spray helps. For long connections, choose a sit-down meal with something warm (soup, oatmeal) instead of only coffee, which can make you feel colder and more dehydrated.
Make a “storm kit” checklist for your phone and wallet. Screenshot your hotel address, confirmation number, and any shuttle instructions in case Wi‑Fi is overloaded. Save your airport’s ground transport map and pickup level notes so you don’t wander outside twice. If your plan includes public transit, keep a backup option (taxi line or hotel shuttle) in mind in case service pauses.
Takeaway: Dress for the outdoor pickup zone, carry essentials in your personal item, and plan for delays so cold and schedule changes don’t compound.
One last practical move: set up your connectivity before you fly so you can react fast when gates, trains, or pickup zones change. Grab an eSIM ahead of time—Telekonek Canada eSIM plans are a simple way to land with data ready, so you can pull live alerts, message drivers, and reroute without hunting for airport Wi‑Fi.